easyjob Freelancer Communication Pack
Documentation
Freelancer Communication
Communication with individual freelancers is made much easier with the easyjob Freelancer Communication Pack. You can view the published schedule of the freelancers directly in easyjob. Requests and confirmations are exchanged electronically and update the resource planner.
Installation and activation
Go to the easyjob program settings to activate the easyjob Freelancer Communication module. A separate installation is not required.
Activating the Freelancer Communication module:
1. easyjob Menu Tools Settings
2. Program Modules tab
3. Select Freelancer
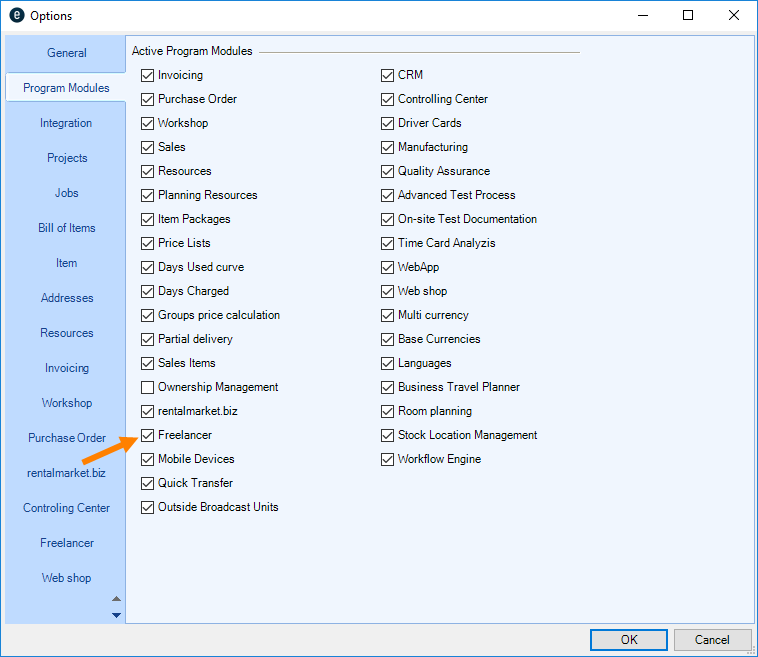
4. Ok
easyjob must be restarted to activate the settings.
Configuration and settings
Communication takes place via e-mail. We recommend using a dedicated e-mail account for this, e.g. freelancer@mycompany.de.
There are two communication possibilities:
E-mail scheduling interface
The scheduling interface creates a scheduling request e-mail according to the standardized protocol RFC 2445. The scheduling request can be processed using most e-mail programs. After the freelancer confirms or cancels the appointment, the message is sent back and updated in the resource request status.
easyjob resource interface
With the easyjob resource interface, an e-mail is generated with a file attachment. The file contains important information regarding further electronic processing.
The protocol has been expanded from easyjob 5 to allow data exchange with temporary employment agencies as well as with other easyjob companies.
License
Each freelancer requires a communication license. After it has been assigned, the license is associated with the address and cannot be assigned to another freelancer.
System requirements
In order to send e-mails, an e-mail server must be available that supports sending e-mails via SMTP and receiving them via IMAP. It may be necessary to configure the e-mail server and the firewall.
easyjob can receive and send the messages. An e-mail program is not required.
easyjob sends the e-mails directly to the workstation computers.
User settings
The rights for carrying out Freelancer Communication and to edit Freelancer data are defined in the user settings.
Assigning the user rights for Master Data:
1. easyjob Menu Tools Manage Users
2. Select a User
3. Edit
4. Access Rights tab
5. Freelancer
6. Assign the desired rights
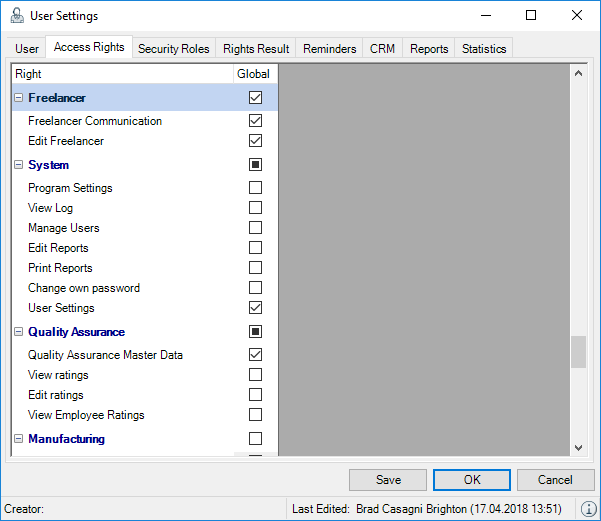
7. Save
8. Ok
Assigning licenses
Each freelancer or temporary employment agency with which you want to communicate requires a license. The license can be assigned in the easyjob program settings or in the resource master data.
Assigning a license to a freelancer:
1. easyjob Menu Master Data Addresses
2. Select an address
3. Resource tab
4. Enter the e-mail address for communication.
5. Assign license
It is also possible in the program settings to view the licenses that have already been assigned and you will receive a recommendation list indicating the people for whom a license is recommended.
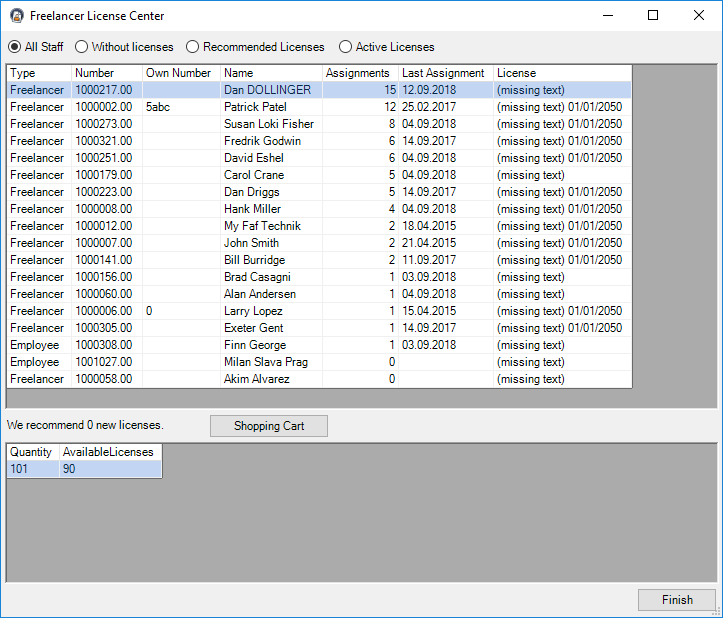
Open license management
1. easyjob Menu Tools Settings
2. Freelancer tab
3. In the Licenses category Manage
Communication settings
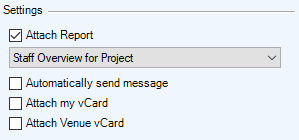
In order to optimize the request, you can pre-fill the e-mail text to the freelancers and add automatic report files as file attachments.
In addition, you can add your own address as well as the event address in vCard format to each message.
With the setting Send messages automatically the e-mail is directly sent after changing the status of the resource assignment. If this function is not active, it can be sent manually in the Communication Center.
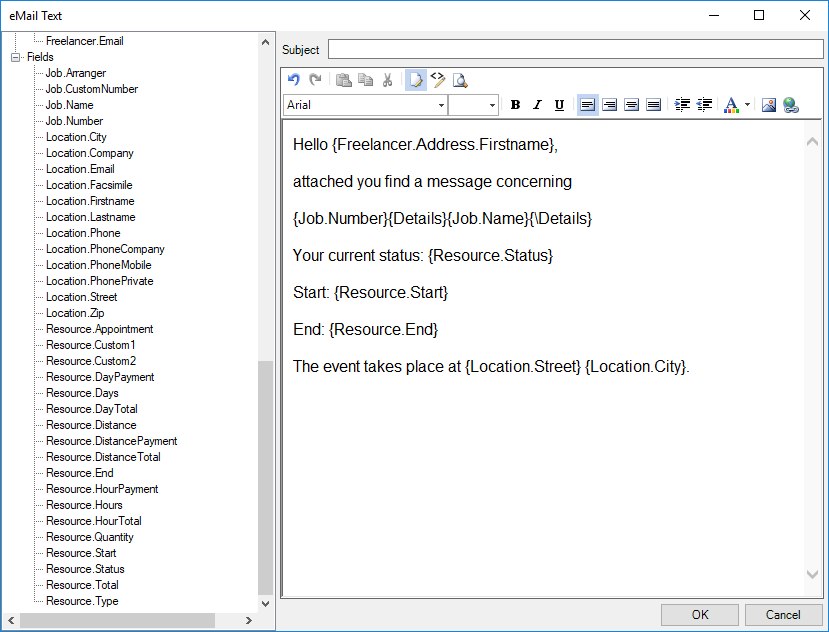
Pre-filling message texts in e-mails
1. easyjob Menu Tools Settings
2. Freelancer tab
3. In the e-mail text category, select Text or HTML format
4. Edit
To better personalize the message, you can use variables in the text.
E-mail-settings
The e-mail settings depend on your e-mail server. In the case of internal e-mail servers such as Microsoft Exchange, it may be necessary to configure the SMTP connectors.
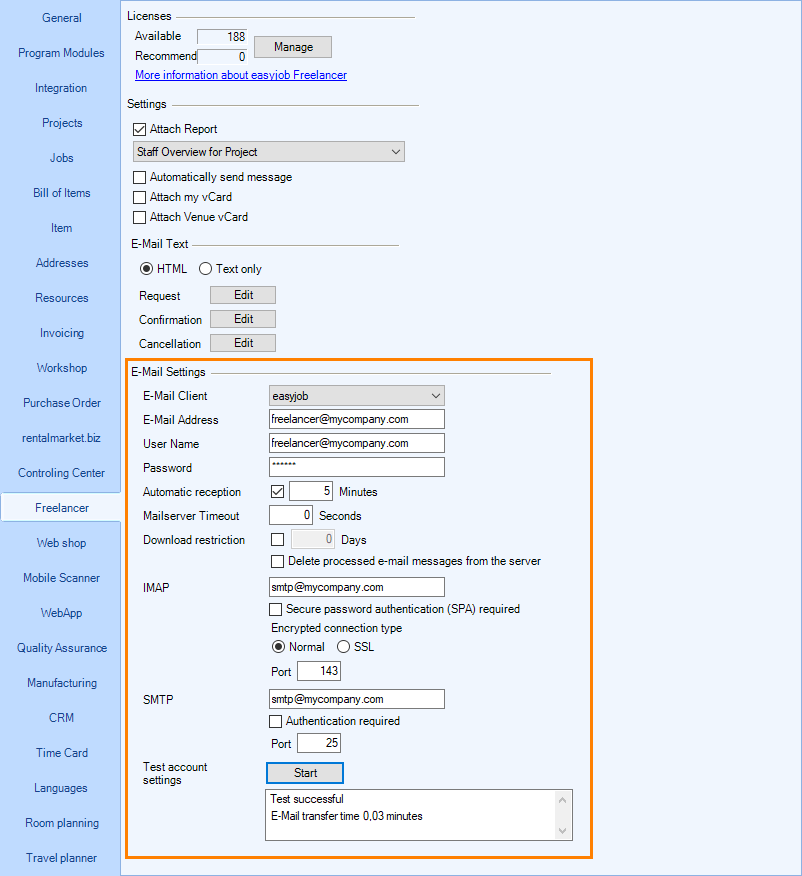
easyjob can send e-mails from a central e-mail account via SMTP/IMAP or use a locally installed Outlook program as the e-mail client. We recommend sending e-mails directly from easyjob. To do this, select the easyjob e-mail client.
When testing e-mail connectivity, a test e-mail is sent via SMTP and retrieved via IMAP. Your selected settings are correct if the test is completed correctly.
Configuring e-mail settings
1. easyjob Menu Tools Settings
2. Freelancer tab
3. Modify the settings
4. Start to test the settings
Master Data
The communication settings for the freelancers are configured in the address master data. You can set a different e-mail address for communication. If you insert no e-mail address, the address from the Main Data will be used automatically when you assign the license.
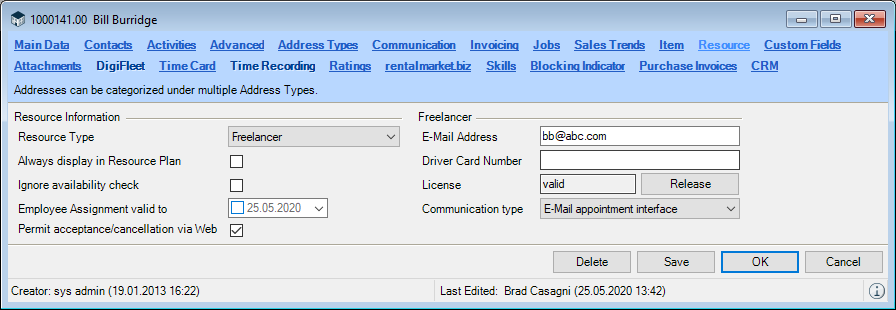
In order to communicate with a freelancer, you must assign a license.
Activating resources for communication
1. easyjob Menu Master Data Addresses
2. Select an address
3. Resource tab
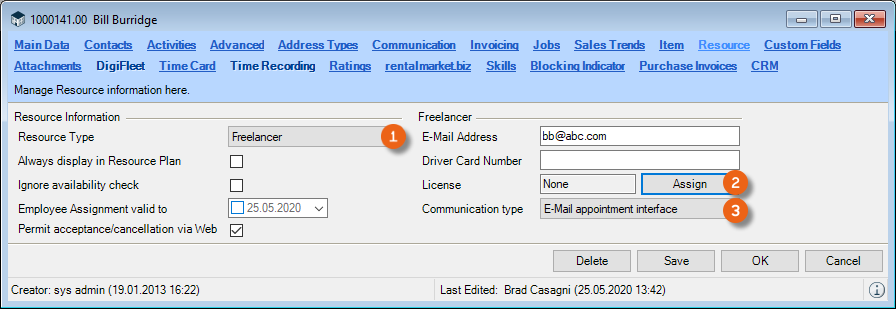
4. Assign the Resource Type Freelancer
5. Assign license
6. For freelancers, set the type of communication E-Mail appointment interface
When you work together with a temporary employment agency, which provides an easyjob resource interface you can alternatively select this communication type.
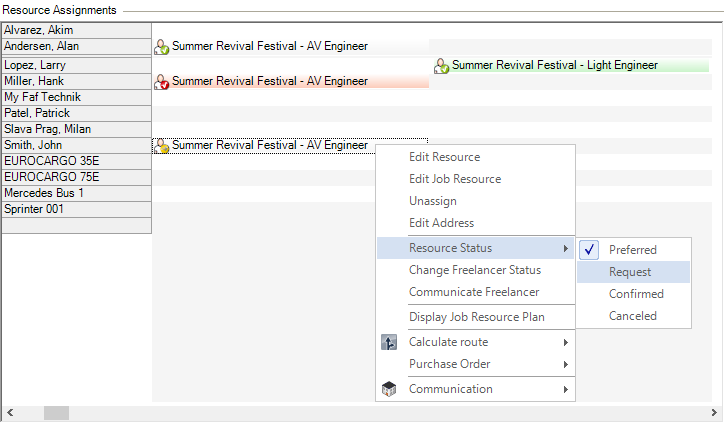
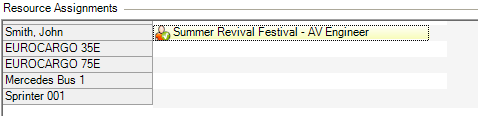
Communication status
In addition to the resource status, also the communication status is recorded for freelancers. This can be used, for example, to see if a request was already sent but has not yet been answered.
The communication status is displayed in the assignment in the resource plan and depends on the resource status.
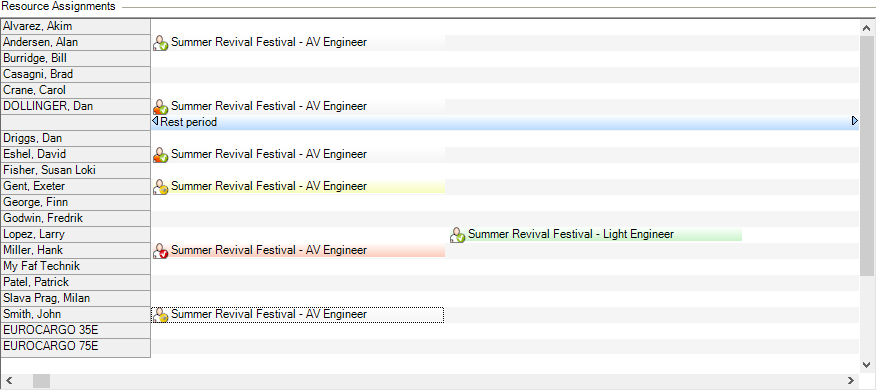
The following table shows the possible status types.
In the case of a standard e-mail scheduling request, not all status types are technically possible.
| Name and Icon | E-mail scheduling interface | easyjob resource interface | Description |
|---|---|---|---|
| Tentative | X | X | The person is tentative |
 Request Request | X | X | The person should be requested |
 Requested Requested | X | X | The request was sent |
 Confirm Confirm | X | The freelancer has confirmed, the reconfirmation has not been sent | |
 Confirmed Confirmed | X | The reconfirmation has been sent | |
 Cancel Cancel | X | X | The cancellation must still be sent |
 Canceled Canceled | X | X | The cancellation has been sent |
| Name and Icon | E-mail scheduling interface | easyjob resource interface | Description |
|---|---|---|---|
 Freelancer confirmation Freelancer confirmation | X | X | The person has confirmed |
 Freelancer cancellation Freelancer cancellation | X | X | The person has canceled |
 Move the time frameUpdate sent Move the time frameUpdate sent | X | X | It is possible to move the time frame using the easyjob resource interface. The Internet scheduling standard does not support this method. In this case, the system will send a cancellation message for the old appointment and generate a new request message for the new appointment. |
 Move the time frameUpdate not yet sent Move the time frameUpdate not yet sent | X | X | The appointment was moved and the update must still be sent. |
Controlling and monitoring the flow of messages
Various filters are available in the resource plan for monitoring and control based on the current communication status.
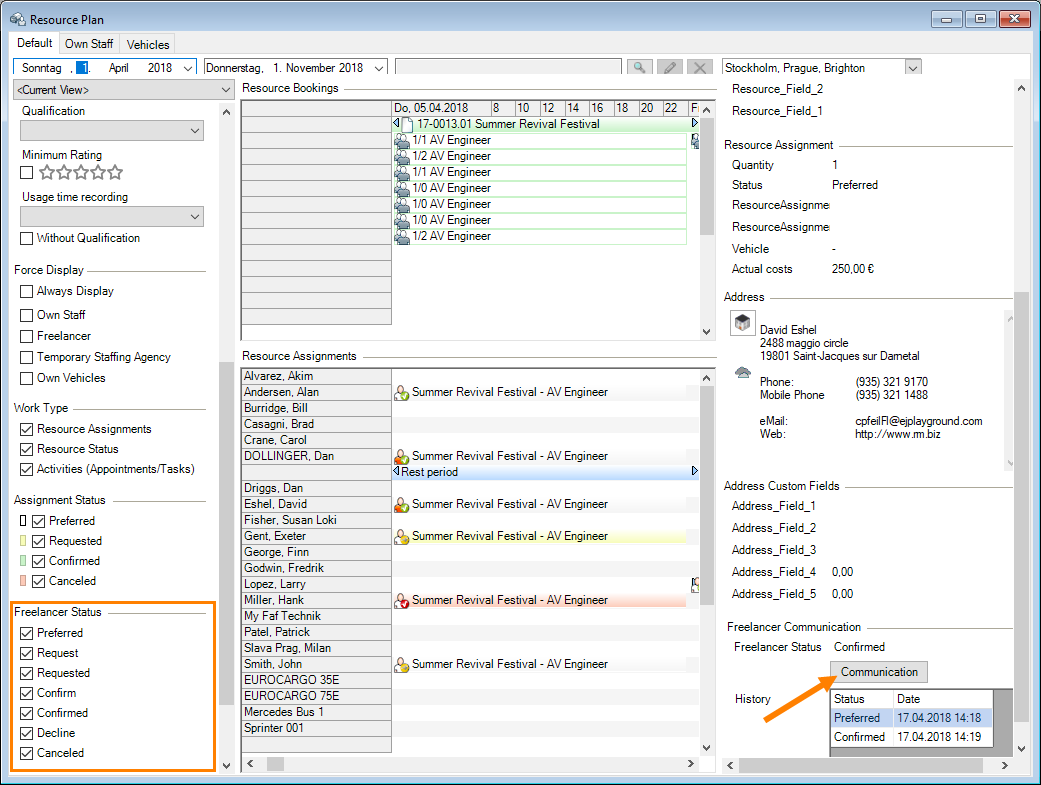
If there are any messages that still must be sent, they can be sent using the Communication function from the resource plan.
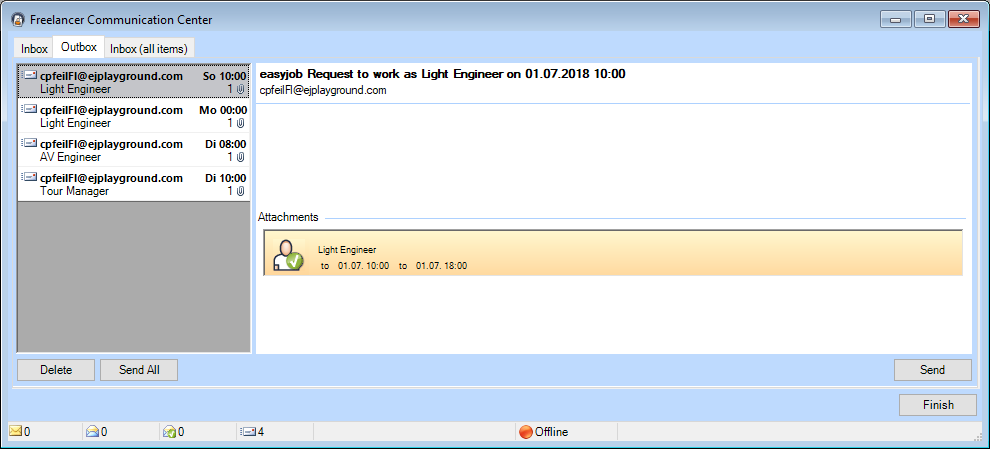
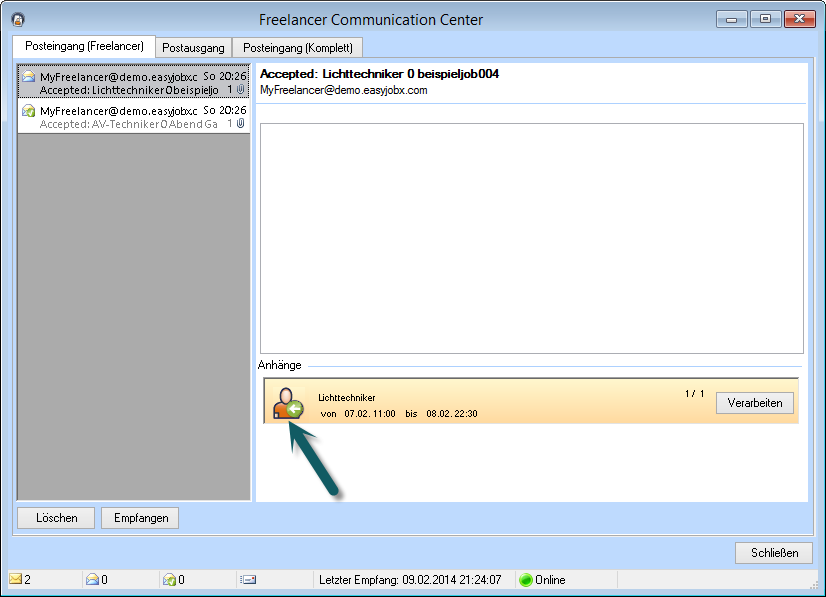
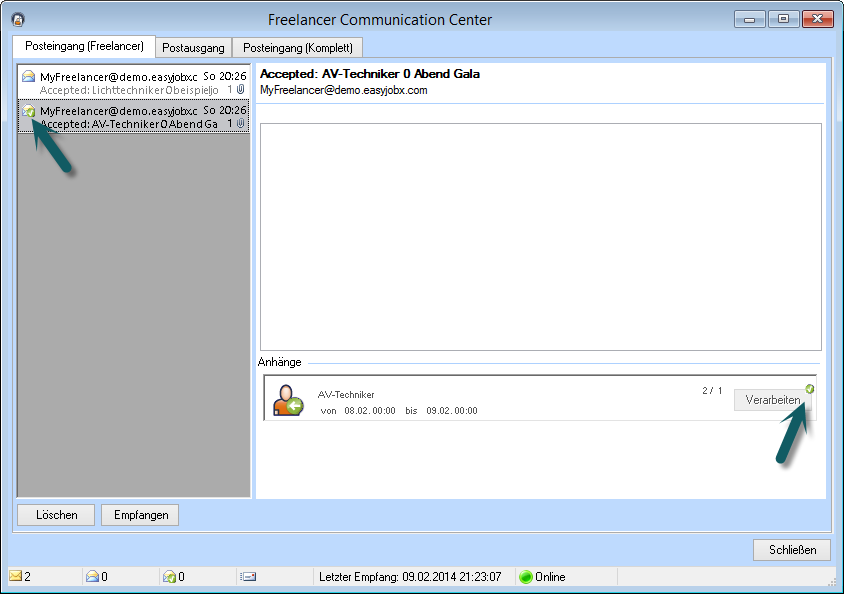
With the Freelancer Communication Center you can see the responses from your resources as well as view and also edit the messages still to be sent.
The In-box shows all possible answer messages for automatic processing for the e-mail account. You can view all the messages in the In-box (complete).
The messages still to be sent can be seen in the In-box.
Processing incoming resource messages
1. easyjob menu View Freelancer Communication Center
2. Select a message
3. Edit
To avoid having to manually search for possible messages in the Freelancer Communication Center, you can set a reminder for incoming and outgoing messages.
Setting a reminder for incoming and outgoing messages
1. easyjob Menu Tools User Settings
2. Reminder tab
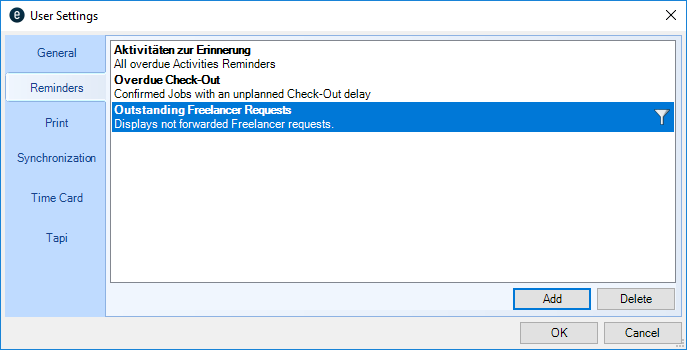
3. Set the desired reminder for incoming and outgoing messages
Messages
Messages are sent and processed via a Wizard. With the Wizard, in addition to processing the message also the current Freelancer status is set. The Freelancer status can be changed manually at any time in the resource plan.
Request message
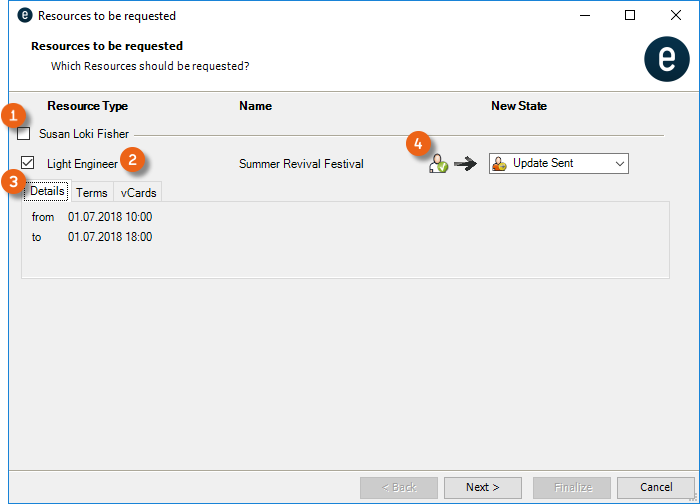
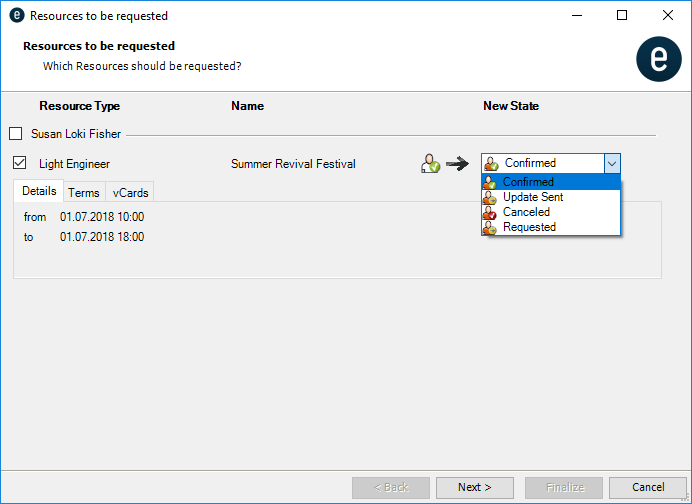
You can process multiple resources at the same time. To do so, select the checkbox in order to process all assignments . The details about the request can be viewed in the tabs . If you want to add the resource address information in vCard format to the request, select the respective address.
View the current status and set the new status. The new status is preset and should not be changed under normal circumstances.
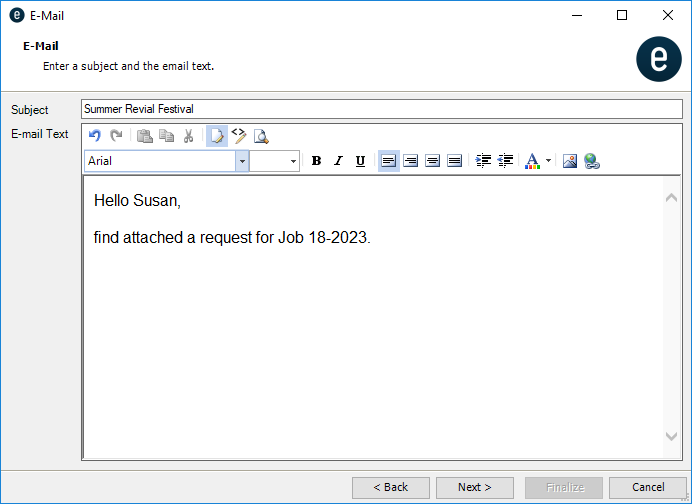
The message text can be predefined in the master data and customized for every request.
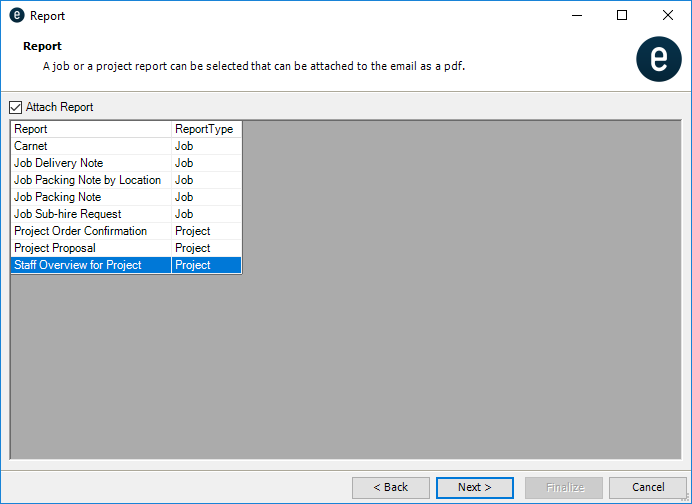
In order to provide the resource with more information about the project, you can add a project related report as a PDF attachment.
Requesting a resource
1. Select the Request status
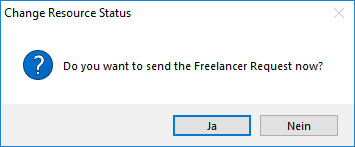
2. Confirm the updating of the request status
3. Follow the steps in the Wizard and finish with Finalize.
Incoming message
Incoming messages are displayed in the Freelancer Communication Center.
Next to the e-mail text, you can see the status confirmed by the freelancer in the preview (acceptance or cancellation).
You can use the message processing Wizard to manually change the new status.
You can see in the Resource Plan tab if the assignment changes and if there is still a shortfall.
Processed messages are indicated in the in-box with a green checkmark on the e-mail symbol as well as on the Processed button.
Processing an incoming message
1. easyjob menu View Freelancer Communication Center
2. Select a message
3. Process
4. Follow the Wizard's instructions