easyjob Warehouse Management System
Documentation
Warehouse Management System
With the easyjob Warehouse Management System (WMS) module, you can map your entire warehouse structure in easyjob. Items and Devices receive either a variable or fixed assignment to a stock location. This assignment can be done manually in the master data as well as upon return using the barcode scanner. The stock locations can be sorted in order to output a route-optimized pack list. These indicate the stock location where the Item or Device is currently located. Each stock location receives a barcode so that when Items are returned, they can be quickly assigned to their respective stock location.
At the end, you can decide if you want to use the barcode scanner to assign a stock location in a flexible manner for your Items and Devices every time (that is, the next one that is free), in order to optimize the stock-in process based on your next upcoming job.
The functionality can also be integrated in on Demand with the preprocessing and postprocessing of Items.
Installation and activation
Go to the easyjob program settings to activate the easyjob Warehouse Management System: A separate installation is not required.
Activate the Warehouse Management System module:
1. easyjob Menu Tools Settings
2. Program Modules tab
3. Select the Warehouse Management System
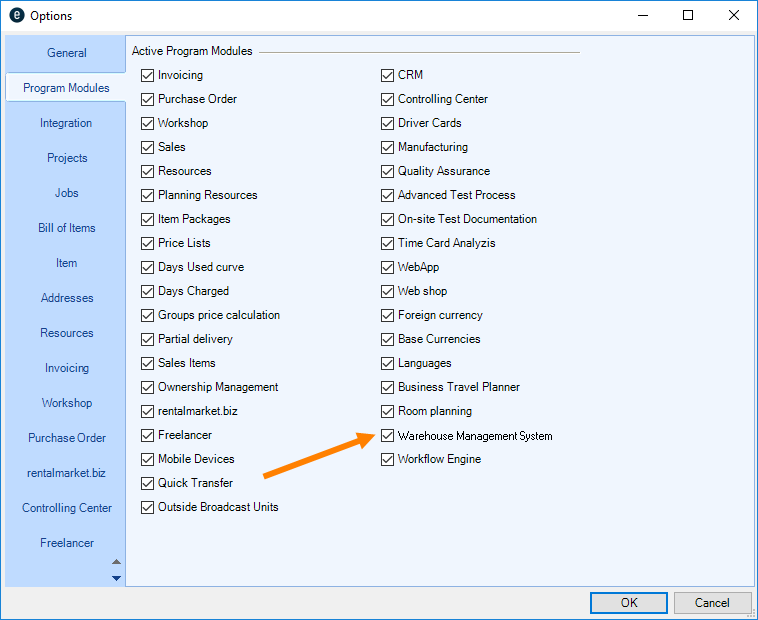
4. Ok
easyjob must be restarted to activate the settings.
General settings
Before you can start stock location management, you must first activate the stock location management for the respective location and for the Item.
To be able to create the warehouse hierarchy and label the barcodes, etc. first leave stock location management deactivated. Once the structure has been created, activate the relative warehouse.
Activating stock location management for the site
If you have already defined a stock location for a certain Item before using the new module, it will be overwritten when activating stock location management.
1. easyjob Menu Master Data Sites
2. Select the desired Site
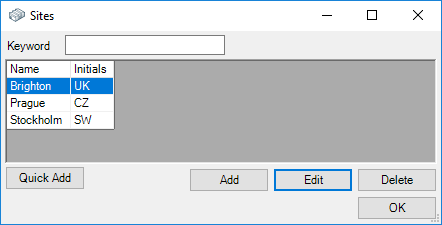
3. Edit
4. Check the Activate stock location management box
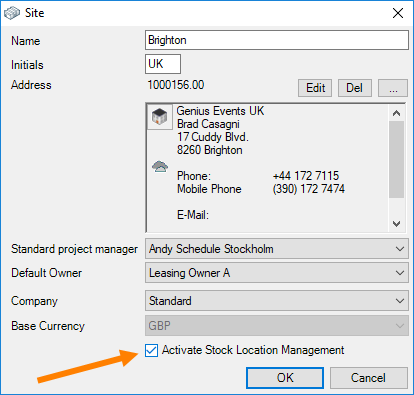
5. Ok
Activating Stock Location Management for the Item
1. Easyjob Menu Master Data Items
2. Select an Item
3. Edit
4. Site tab
5. Check the Activate Stock Location Management box
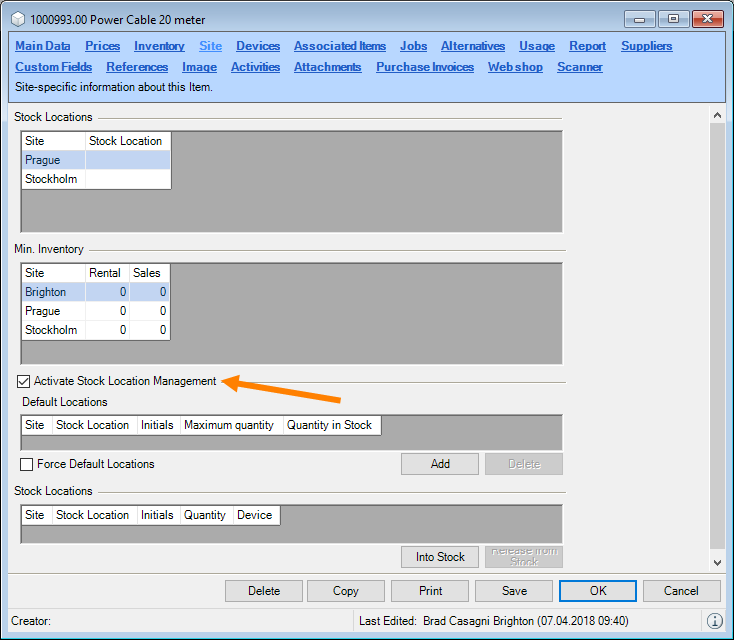
6. Save
7. Ok
As the Item stock locations are normally created step wise in easyjob, you can activate the stock locations individually for each Item. If you want to activate entire Item groups or all Items at the same time for stock location management, contact our easyjob Support for an SQL Script at http://helpdesk.protonic-software.com/.
Reports and barcode labels
In order to receive a sample report, please contact our easyjob Support at http://helpdesk.protonic-software.com/ .
Concept
The conceptual idea behind the Warehouse Management System module is to first provide the stock locations (e.g. hall, aisle, shelf, compartment, etc.) of your Items and Devices with a barcode sticker. At stock in, first scan the barcode of the stock location and then the Item or Device you want to store there. For Check-Out, create individual pack or load lists sorted by stock locations to minimize the route in the warehouse. At Check-In, decide between a stock location you predefined, or a completely new stock location (e.g. one that just became free and is closest). With the Warehouse Management System, you have an overview at any time and anywhere of the location where your Item or Device is currently located in your warehouse.
This manual does not go into detail about the functions of the scanner. All aspects concerning the scanner are currently being reprogrammed and revised To use a scanner for this module, the scanner must always be online. As soon as programming is complete, the missing information will be added to the manual.
Warehouse hierarchy of the stock locations
You can create as many hierarchical stock locations in the master data as you want. In the easyjob Multi-Site version, the stock locations are created per site. The stock locations receive their own barcode. To be able to start with the Warehouse Management System module, first create the structure of your warehouse in the master data. Start with the largest stock locations (e.g. halls) and continue with all hierarchical levels (e.g. room, aisle, shelf, compartment, etc.) down to the smallest stock location.
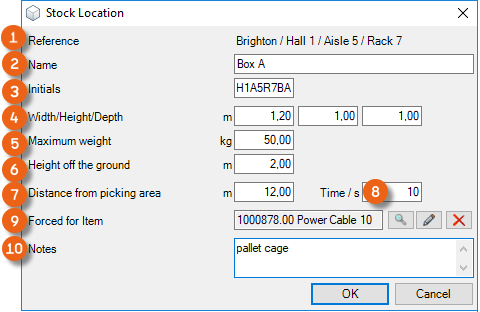
You can add additional parameters for individual stock locations. The reference shows your current location in the tree structure . In addition to Name , Initials , and Dimensions , you can specify the maximum weight and the height off the ground . Removing the distance from picking area and the time required to do so are currently no longer used in easyjob. It is possible to create an Output in for sorting in reports, statistics or utilization for a workflow in order to always obtain the most optimal route. The stock location can be reserved for a certain Item .
If the stock location is reserved for a certain Item, only this Item or Device of this Item can be stored there and nothing else.
A notes field is also available.
Define the warehouse hierarchy:
1. easyjob Menu Master Data Stock Locations
2. Select the desired warehouse
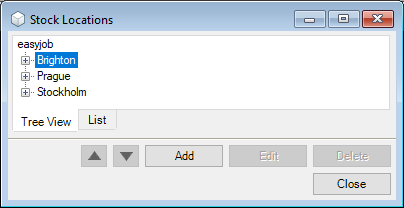
3. Add
4. Enter a name and the details
5. Ok
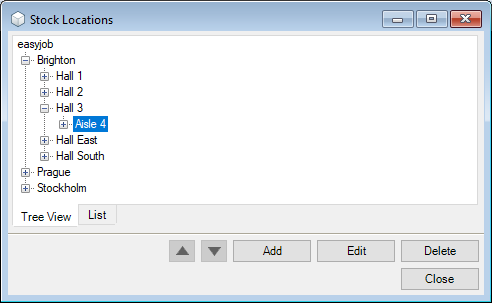
After you have created the first hierarchy (e.g. hall 1), you can click directly on Add without opening up the tree structure again. The reference stores the last stock location and links it directly. This makes it possible to quickly create all stock locations one after another
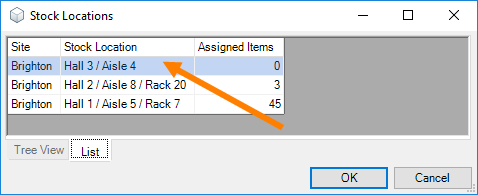
The list view of the stock locations displays the tree structure in a list and the assigned number of Items.
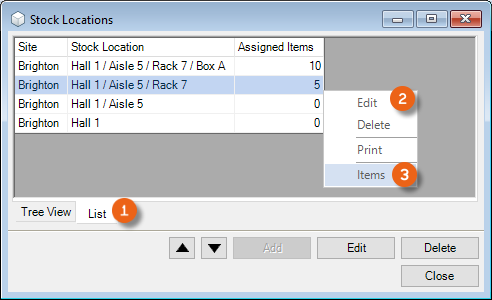
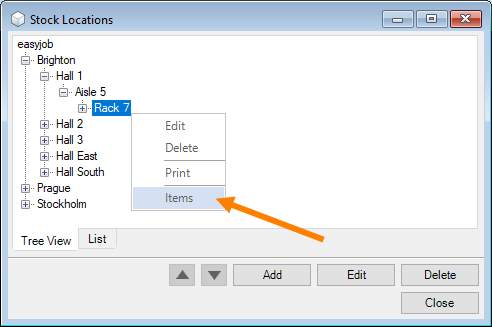
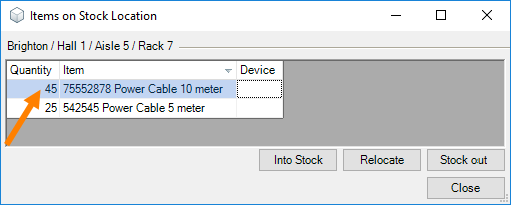
Via the context menu you can edit, delete, print (e.g. a barcode) the stock location or open a view to manage an Item in the stock location . See also Items in stock location management.
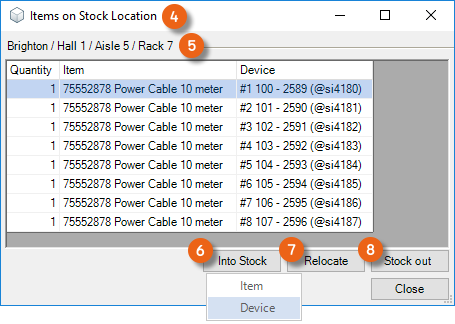
The stocked Items and Devices are displayed here With Stock in you can add additional Items or Devices, with Relocate you can define a new stock location and with Stock out you can remove the Item from the stock location.
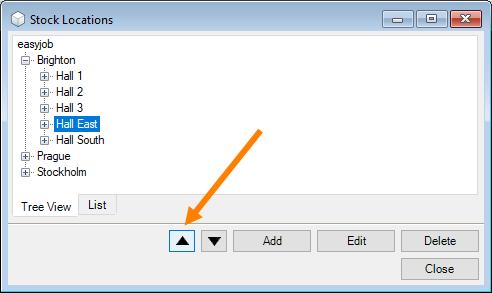
The same context menu can be found in the tree structure. You can adjust the hierarchy at any time by changing the order of the stock locations using the arrow keys. This makes it possible to sort pack or load lists according to this order.
Items in stock location management
After you have defined your stock locations, you can start with the stock in operations. Stock location management can be per Item, per Device, or mixed.
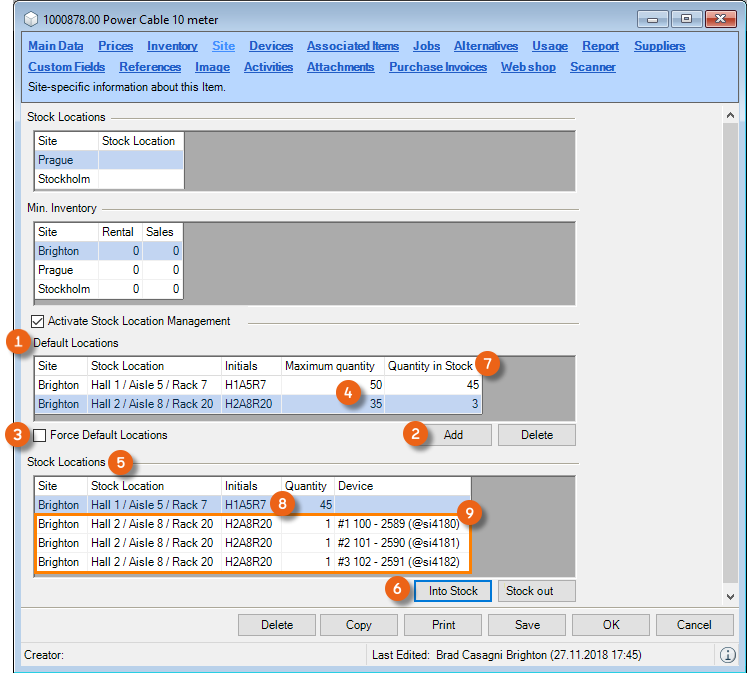
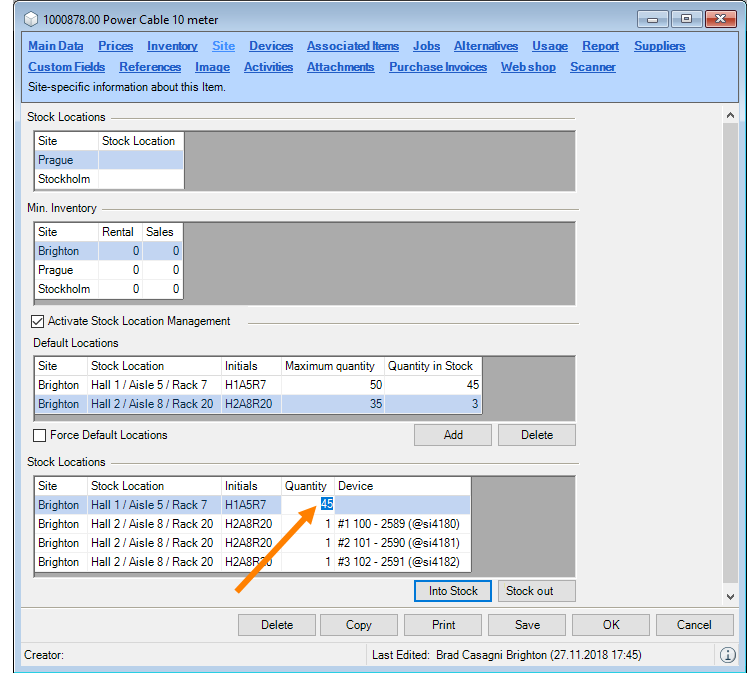
In Item master data, you can optionally add its default location .
You can also force default locations for this Item. In this case, the Item can only be stored in the stock locations selected there and nowhere else.
The maximum quantity can be entered directly in the field by clicking with the mouse. This is used for orientation purposes, and a greater quantity can still be stored. After you have defined the stock locations, you can put the quantity of Items or individual Devices in the stock locations into stock . The quantity in stock results from the quantity of the stored Items and Devices .
Add default stock locations
1. Easyjob Menu Master Data Items
2. Select an Item
3. Edit
4. Site tab
5. Add
6. Select a stock location
7. Ok
8. Optionally enter the maximum quantity
Force default stock locations
1. Easyjob Menu Master Data Items
2. Select an Item
3. Edit
4. Site tab
5. Check the Force Default Locations box
Placing Items in and out of stock
Items can be managed from the Item master data or from the stock location master data.
Placing Items in stock via the Item Master Data
1. Easyjob Menu Master Data Items
2. Select an Item
3. Edit
4. Site tab
5. Stock in
6. Items
7. Select the stock location.
If you have activated Force default locations, only this selection will be displayed.
Select the desired stock location from the list
8. Ok
Placing Devices in stock via the Item master data
1. Easyjob Menu Master Data Items
2. Select an Item
3. Edit
4. Site tab
5. Stock in
6. Device
7. Select the Device
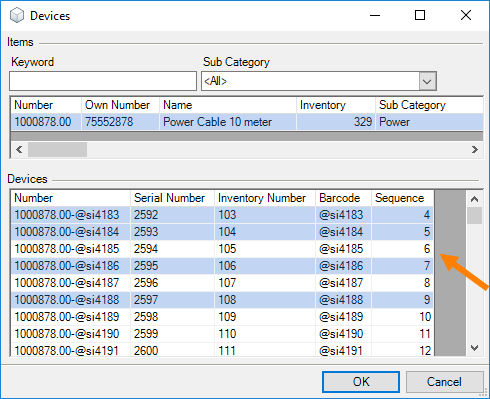
8. Ok
9. Select the stock location.

If you have activated Force Default Locations, only this selection will be displayed.
Select the desired stock location from the list
10. Ok
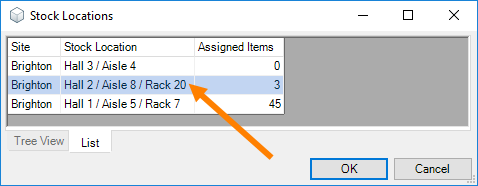
The Assigned Items column shows the total of all Items and Devices that you have assigned to the stock location. These can be many different Items.
Placing Items in stock in via the stock location master data
1. easyjob Menu Master Data Stock Locations
2. Select the desired warehouse
3. Select the desired stock location
4. Right mouse button
5. Items
6. Stock in
7. Select and Item and adjust the quantity
8. Close
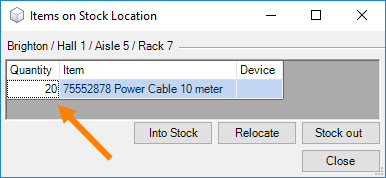
The scanner behaves in the same manner. First take the barcode of the stock location and assign the desired Item or Device to it.
The quantity of stored Items can be changed by double clicking the Quantity field.
 <sh>
<sh>
To take all Items out of stock, use the Stock out button.
Taking Items out of stock via the Item master data
1. Easyjob Menu Master Data Items
2. Select an Item
3. Edit
4. Site tab
5. Stock out
6. Yes
Taking Items out of stock via the stock location master data
1. easyjob Menu Master Data Stock Locations
2. Select the desired warehouse
3. Select the desired stock location
4. Right mouse button
5. Items

6. Select the desired line
7. Stock out
8. Yes
You can change the quantity of stored Items by double clicking the Quantity field.
Relocating Items via the stock location master data
1. easyjob Menu Master Data Stock Locations
2. Select the desired warehouse
3. Select the desired stock location
4. Right mouse button
5. Items
6. Select the desired line
7. Relocate
8. Select the desired warehouse
9. Ok
Logic when taking Items and Devices out of stock
The following logic is used when scanning Items and Devices and taking them out of stock:
In the stock location: 5 Items, 2 Devices
Stock out: 6 Items
Result: 5 Items are taken out of stock
In the stock location: 5 Items, 2 Devices
Stock out: 7 Items
Result: All Items and Devices are taken out of stock
In the stock location: 5 Items, 2 Devices
Stock out: 1 Device that is not in and also not somewhere else
Result: Take 1 Item out of stock
In the stock location: 5 Devices
Stock out: 4 Items
Result: not possible
In the stock location: 1 Device
Stock out: 1 Device that is not in and also not somewhere else
Result: not possible
In the stock location: 1 Item
Stock out: 1 Device that is not in and also not somewhere else
Result: Take 1 Item out of stock
Views
In easyjob, a view in the Item and a part in the Bill of Items provide a better overview of stock location management.
Items not in stock
In the Items not in stock view you can enter a search text to filter by certain Items and the site If you want all Devices to be displayed, check the box accordingly. You can see how many Items of your selection are available in the company that are not yet in stock . Use the right mouse button to place Items directly into stock . The value in the In stock location column results from the sum of the Items from the individual stock locations . The 5-day forecast shows how many Items are available for the next 5 days in confirmed jobs.
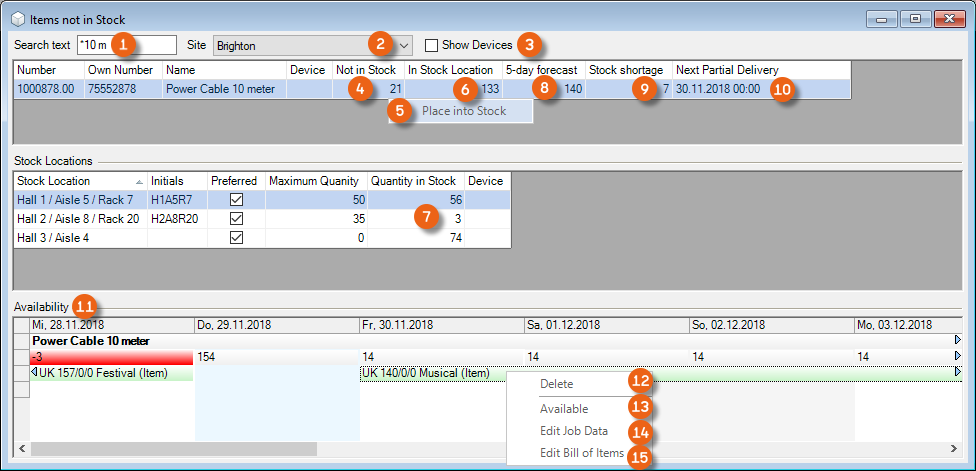
Stock shortage results from the 5-day forecast less the quantity in stock . Furthermore, the data for the Next partial delivery for this Item is displayed. More details regarding the scheduled jobs are shown in Availability . You can use the context menu to delete Items from the job . From here you can directly open the Available view and edit the job data or the bill of Items .
Open view
1. easyjob Menu Items
2. Items not in stock
3. Select an Item
Warehouse hierarchy in the Bill of Items
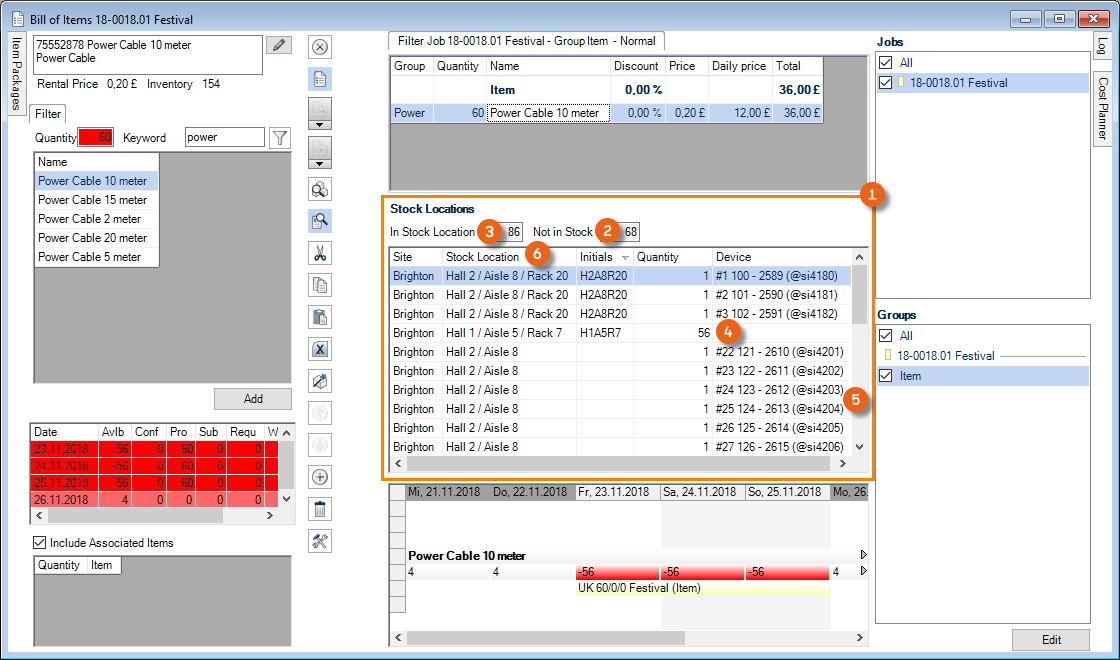
In the Bill of Items, the Stock locations part can be activated via the settings. For each Item, the quantity of the Not in stock and In stock Items and Devices and their stock location are displayed here.
Check-In
With Check-In, the Device or Item is scanned into stock and can be assigned to the new stock location also using the scanner.