easyjob Webshop
Documentation
Installation and configuration
Introduction
The Webshop-Plugin connects your WordPress-WooCommerce-Plugin with easyjob. In order to integrate this feature, you will need to have in-depth knowledge of WordPress or hire a marketing professional who is experienced with this product.
Our Product Support team will gladly assist you with any issues or concerns regarding the interface between easyjob and the WooCommerce-Plugin.
Please note that we are not affiliated with Wordpress and can only address concerns related to easyjob.
You will need to contact a WordPress professional directly for any questions related to the installation, design, functionality or customization of Wordpress products.
Concept
In order to provide you with as much flexibility as possible, we have developed the easyjob WebShop Plugin with the Wordpress-WooCommerce-Plugin on widely available technology. In this way, web developers are provided with extensive options for customizing the WebShop to suite individual needs.
Unlike the easyjob WebApp, the WebShop does not require any live access to your system.
The Plugin synchronizes your items from the easyjob database with your shop database. Synchronization can take place manually or automated at certain intervals.
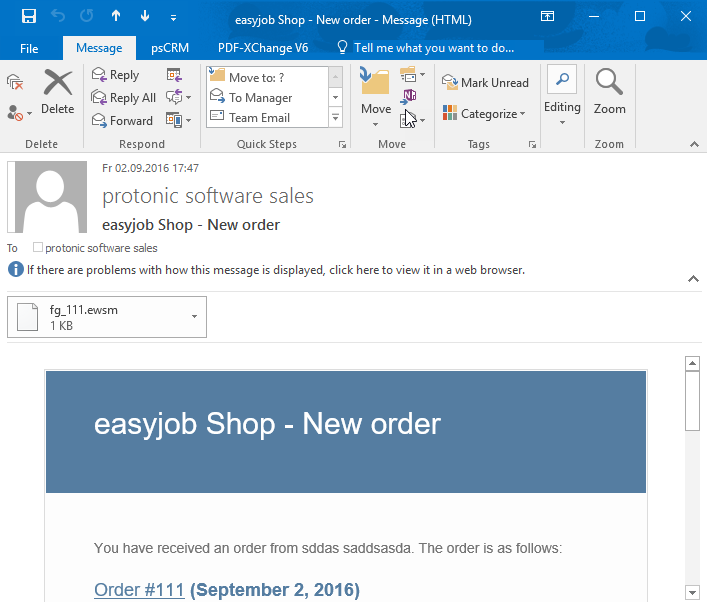
The customer places the desired items in the cart. After sending the cart, the order is sent via an e-mail with a file attachment to a company e-mail account. The order file is opened with easyjob and is used to create a project.
Technical requirements
Some requirements are necessary for the first-time use of the easyjob WebShop Plugin:
easyjob Installation (at least version 6.3.2.43)
easyjob WebShop license
Wordpress website with WooCommerce
Installation of the easyjob WebShop Plugin in WooCommerce
Configuration of the WebShop Plugin in easyjob
Editing of easyjob Master Data
Installation of WooCommerce
Follow these steps to install and configure the WooCommerce Plugin:
1. WooCommerce must be installed in WordPress.
2. Dashboard Plugins Add New Search for WooCommerce and click Install Now

3. After installation is successful, click Activate Plugin
4. The WooCommerce configuration screen will appear
5. Select Let’s Go Continue
Set your country, currency and units and select Continue
6. Select your tax rate and continue
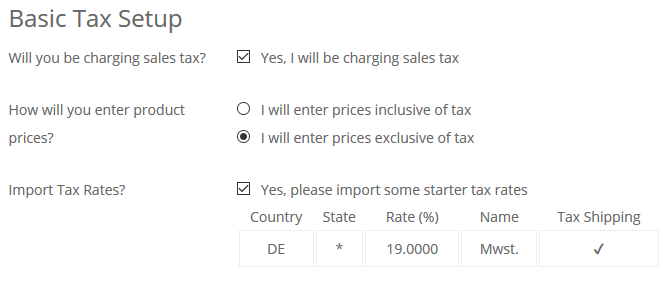
7. Important: Select I will enter prices exclusive of tax
8. Select Continue
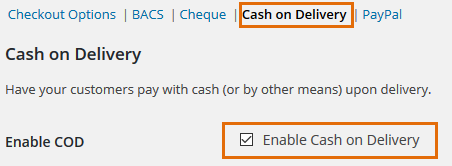
9. Select Cash on Delivery and then select Continue
10. Return to the WordPress Dashboard
11. Load the easyjob WebShop Plugin via the url http://www.protonic-software.com/de/service/community on protonic software website

12. Admin Dashboard Plugins Add New Upload Plugin
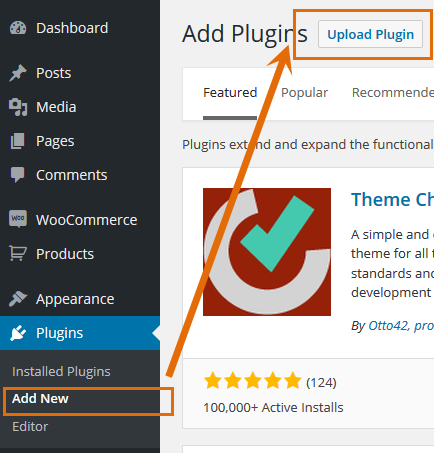
13. Select here the loaded zip file and start the installation with Install Now 
14. Activate Plugin

Configuring the easyjob WebShop Plugin
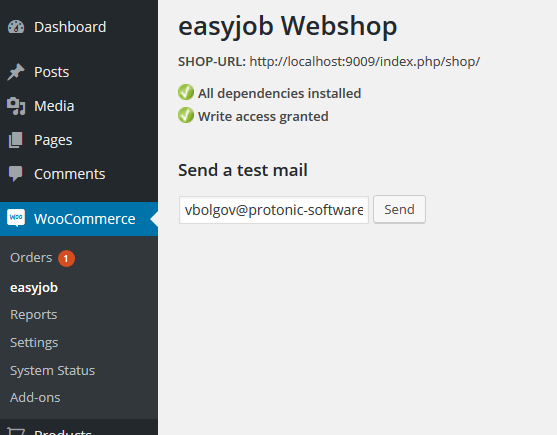
The easyjob WebShop Plugin configuration can be accessed via Dashboard WooCommerce easyjob.
If you receive an error message regarding insufficient access rights, you must be granted the PHP user write access for the directory "..\wp-content\plugins\easyjob\orders".
Configuration – WooCommerce
WooCommerce permits many customization options. The settings addressed below are those that are necessary for proper operation with easyjob.
E-Mail basic settings
To allow the shop to send a notification e-mail with the respective order, the email settings must be configured.
If you have problems with sending emails, we recommend the Postman SMTP Plugin (https://wordpress.org/plugins/post-smtp/) to test it.
Activating e-mail notification
1. Dashboard WooCommerce Settings Emails easyjob Shop Order
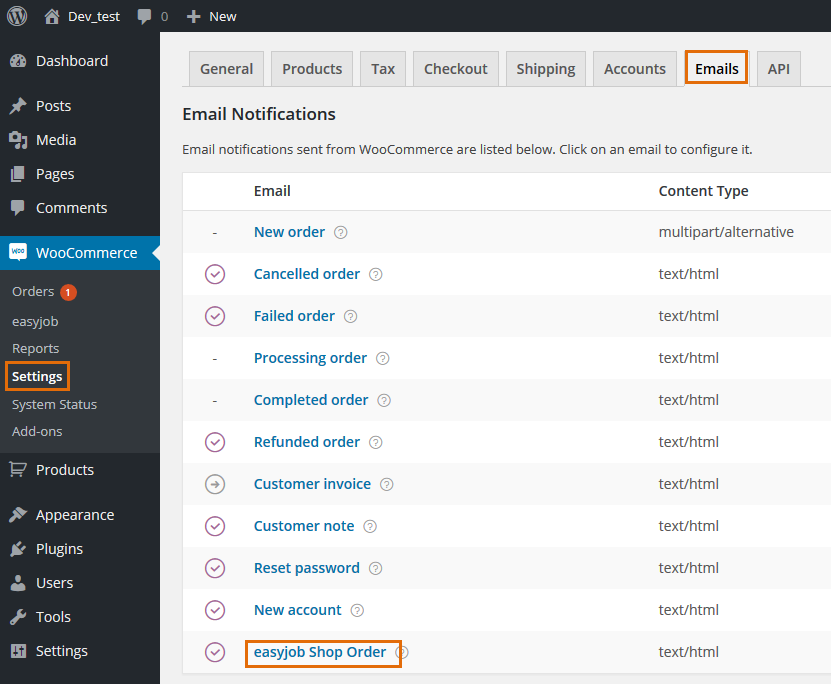
2. Activate Enable easyjob Order and enter the e-mail recipient
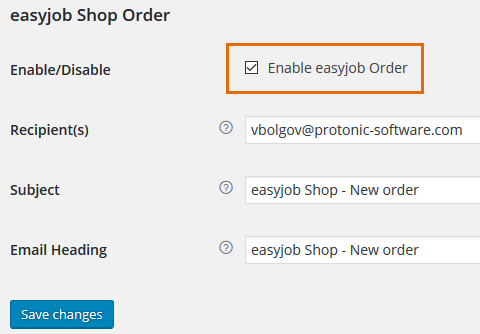
3. Following configuration, send a test e-mail
If sending an Order does not function for some reason, you can try to send it again.
Resending the Order
1. AdminDashboard WooCommerce Orders Check all necessary Orders in the Bulk Actions dropdown menu select Resend easyjob Order and confirm with Apply.
Additional basic settings
No content for this section.
Tax
The tax settings must be customized if the configuration was incorrect when installing the shop Plugin or if additional tax codes should be added.
The calculation of taxes can be completely deactivated. If it is enabled, you must select I will enter prices exclusive of tax, to ensure that the prices are consistent with the prices from easyjob.
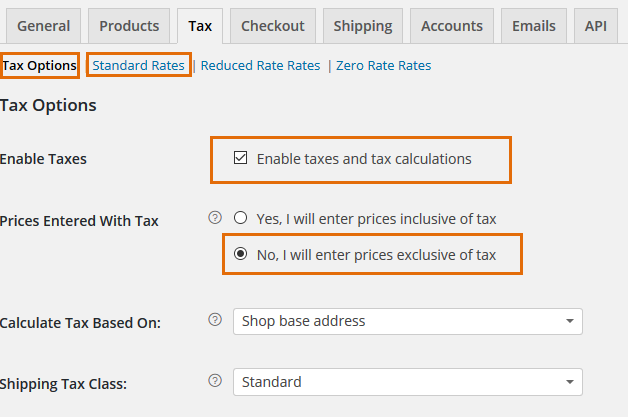
Under Standard Rates, the tax can be determined independently of the country or city.

Payment method
The payment methods must only be customized if the configuration was incorrect when installing the shop Plugin or if additional payment types should be added.
In a normal case, all payment types except for Cash on Delivery can be deactivated.

Customizing the payment type
1. WooCommerce Settings Checkout
Configuration in easyjob
After successfully activating easyjob, the WebShop module will be available in easyjob.
Activating the easyjob WebShop Plugin:
1. Extras Options Functions Activate the WebShop Plugin
Configuration of the WebShop Plugin:
1. Extras Options WebShop Activate
2. Select WordPress Plugin
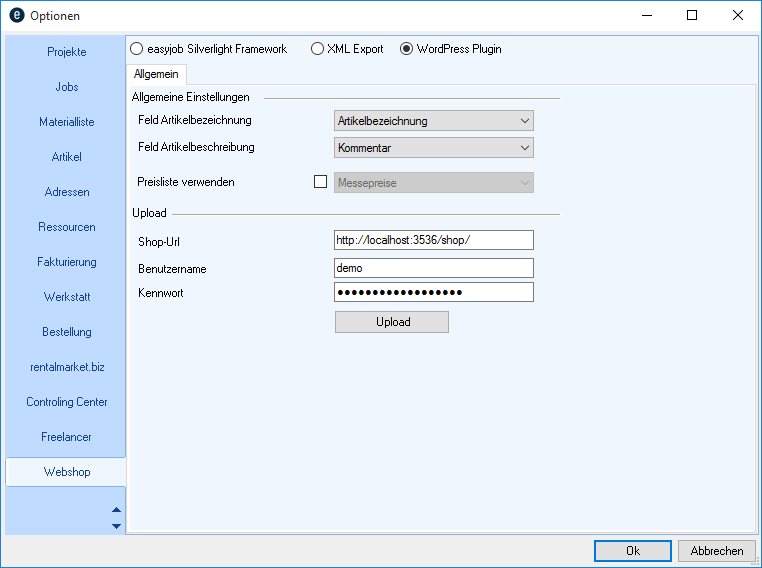
Configure the fields to be used for the Item Name and the Item Description. It is also possible to use your own price list for the Item Price List.
In the Upload Settings, select the URL of your WebShop as well as the Wordpress access data.
Select Upload to perform the first upload of the Item data.
You can perform an Upload manually at any time as well as automatically via the Server Manager.
Setting up automatic synchronization
1. Servermanager WebShop Upload Configure Task
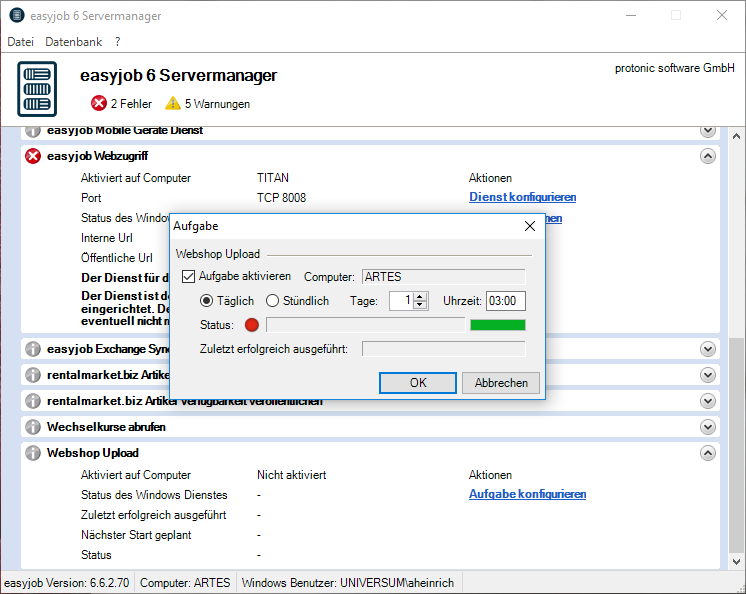
2. Select the desired interval. We recommend a daily synchronization overnight.
easyjob Master Data
In the Item Master Data, you can decide which Items to publish in the WebShop.
Publishing Items in the WebShop:
1. Item Master Data Select Item WebShop tab
2. Activate Publish
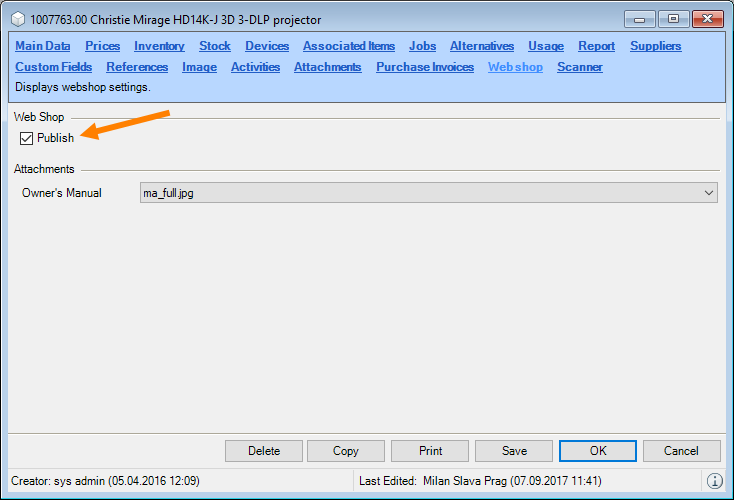
3. Save
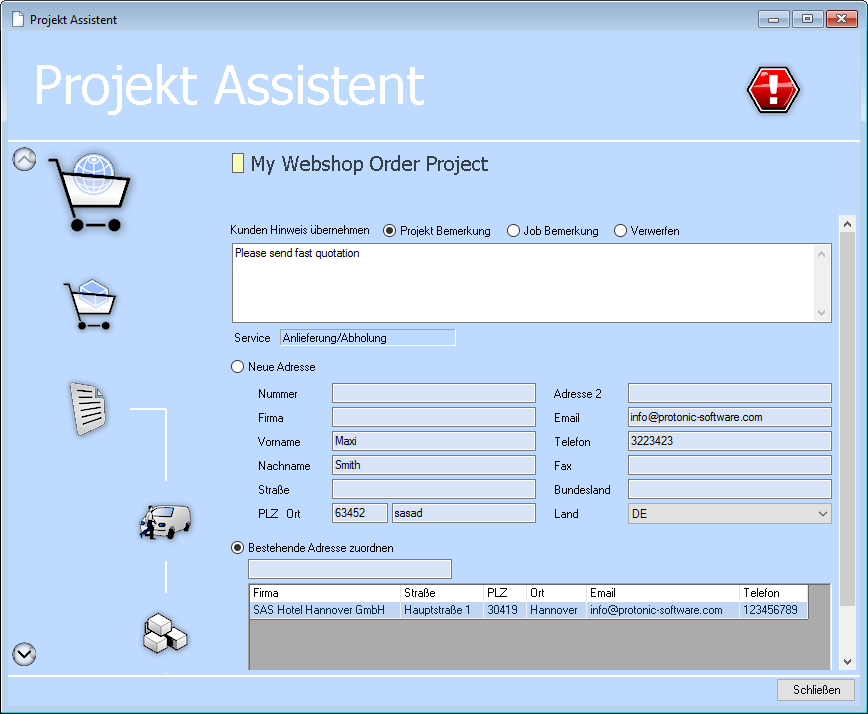
Importing an Order in easyjob
You receive an e-mail with an attachment for every WebShop Order.
Processing the WebShop Order
1. Export the e-mail attachment to a computer with the easyjob application installed.
2. Follow the wizard to create a finished product from the Order.